 Rear floor assembly后地板总成
Removal procedure拆卸程序
|
1. Disassemble the rear anti-collision beam assembly1. 拆卸后防撞梁总成
|
|
2. Remove the rear section of the left side outer panel2. 拆卸左侧围外板后段
|
|
3. Remove the left rear drain channel assembly3. 拆卸左后流水槽总成
|
|
4. Remove the left rear side panel assembly4. 拆卸左后侧围总成
|
|
5. Remove the rear floor assembly5. 拆卸后地板总成
1 Remove the sealant around the rear floor assembly.除去后地板总成周围密封胶。
|
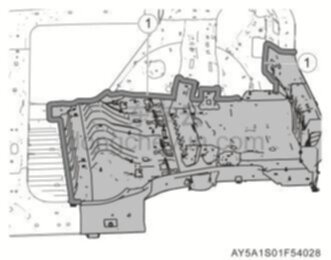 |
2 Clean the welding area to expose the solder joints, use an electric drill to drill out the solder joints in the raised area ①, and use a chisel and hammer to disassemble the solder joints.清洁焊接区域,露出焊点,使用电钻钻除凸起区域①的焊点,使用凿子和锤子拆开焊接点。
|
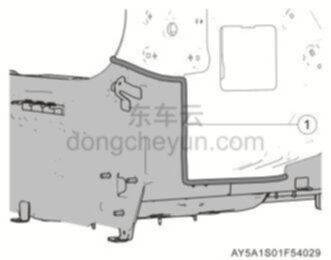 |
3 Use an electric drill to remove the solder joints in the raised area ①, use a chisel and hammer to disassemble the solder joints, and remove the rear floor assembly.使用电钻钻除凸起区域①的焊点,使用凿子和锤子拆开焊接点,取下后地板总成。
|
Installation procedure安装程序
|

|
1. Install the rear floor assembly1. 安装后地板总成
1 Sand the weld surfaces and bonding surfaces of the new parts until metal is exposed, then use a silicone-free cleaner to clean the body and bonding areas of the new parts.打磨新部件的焊缝表面和粘合表面,直至有金属暴露出来,然后用无硅油清洁剂,来清洗车身和新部件的粘合区域。
|
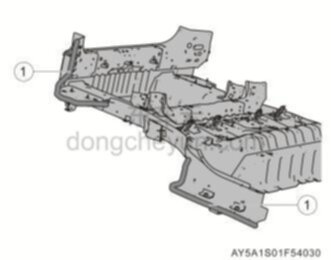 |
2 Apply structural glue to the welding position ①.在焊接位置①上涂抹涂抹结构胶。
|
|
|
3 Place and adjust the rear floor assembly to the installation position, fix it with self-locking clips, and use a MAG welder to weld the area shown in the figure ①.放置并调整后地板总成到安装位置,使用自锁夹固定,使用MAG焊机焊接图示区域①。
|
|
|
4 Use a spot welder to weld the area shown in the picture ①.使用点焊机焊接图示区域①。
5 Use sealant to seal the joints between the component and the body.使用密封胶密封部件与车身之间的接缝。
6 Spray the exterior surface with topcoat.对外观面进行面漆喷涂。
|
|
2. Install the left rear side panel assembly2. 安装左后侧围总成
|
|
3. Install the left rear drain channel assembly3. 安装左后流水槽总成
|
|
4. Rear section of the left side panel installed4. 安装左侧围外板后段
|
|
5. Install the rear anti-collision beam assembly5. 安装后防撞梁总成
|